AI sa Pagpoproseso ng Larawan mula sa Mikroskopyo
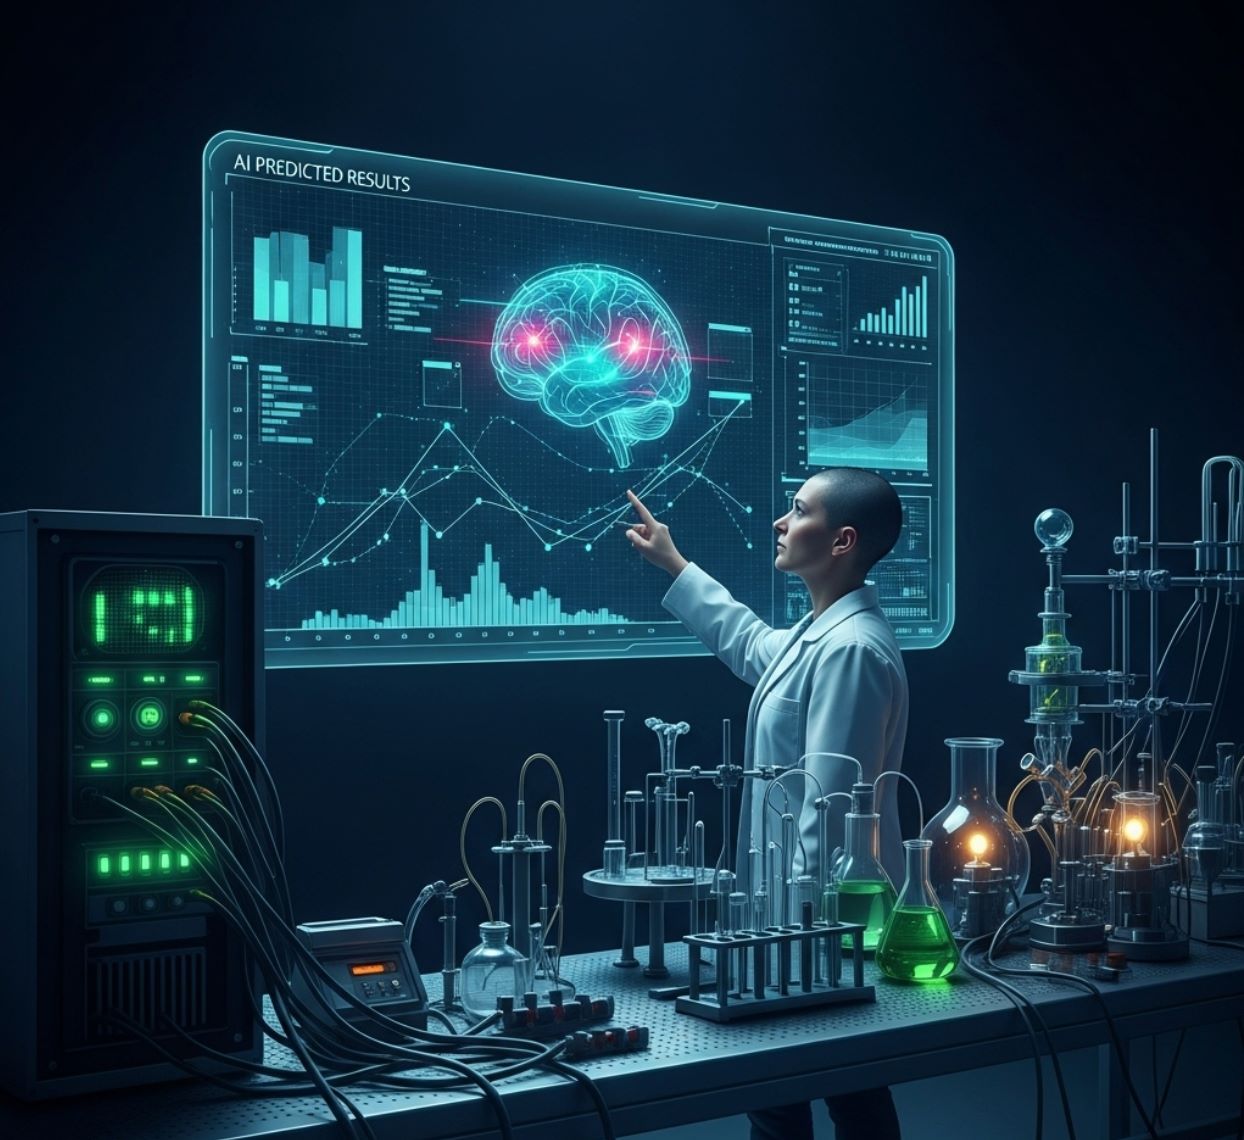
Binabago ng AI ang pagpoproseso ng larawan mula sa mikroskopyo gamit ang makapangyarihang kakayahan tulad ng tumpak na segmentasyon, pagbabawas ng ingay, super-resolution, at awtomatikong pagkuha ng larawan. Itinatampok ng artikulong ito ang mahahalagang AI na kagamitan at mga umuusbong na uso sa pananaliksik sa agham.
Binabago ng mga teknik ng AI ang mikroskopyo sa pamamagitan ng pag-optimize ng pagkuha ng larawan at awtomatikong pagsusuri. Sa mga makabagong matatalinong mikroskopyo, maaaring ayusin ng mga AI module ang mga parameter ng pagkuha ng larawan nang real-time (hal., pokus, ilaw) upang mabawasan ang photobleaching at mapahusay ang signal. Samantala, ang mga deep learning algorithm ay maaaring salain ang komplikadong datos ng larawan upang makuha ang mga nakatagong biyolohikal na kaalaman at kahit iugnay ang mga larawan sa ibang datos (hal., genomics).
- 1. Mga Paraan ng AI: Machine Learning kumpara sa Deep Learning
- 2. Visual na Paghahambing: ML kumpara sa DL Pipelines
- 3. Pangunahing Aplikasyon ng AI sa Mikroskopyo
- 4. Mga Sikat na AI na Kagamitan sa Pagpoproseso ng Larawan mula sa Mikroskopyo
- 5. Mga Hamon at Hinaharap na Direksyon
- 6. Pangunahing Mga Punto
Mga Paraan ng AI: Machine Learning kumpara sa Deep Learning
Ang mga paraan ng AI ay mula sa klasikong machine learning (ML) hanggang sa makabagong deep learning (DL). Bawat pamamaraan ay may kanya-kanyang lakas at limitasyon:
Manwal na Ginawang Mga Katangian
- Manu-manong ginagawa ng mga mananaliksik ang mga katangian ng larawan (gilid, tekstura, hugis)
- Pinapakain ang mga katangian sa mga classifier (decision trees, SVM)
- Mabilis sanayin
- Nahihirapan sa komplikado o maingay na mga larawan
Awtomatikong Pagkatuto ng Katangian
- Multi-layer neural networks (CNNs) ang awtomatikong natututo ng mga katangian
- End-to-end na pagkatuto mula sa raw pixels
- Mas matatag sa mga pagbabago
- Matibay na nakakakuha ng masalimuot na tekstura at istruktura
Paano gumagana ang CNNs: Ang convolutional neural networks ay naglalapat ng sunud-sunod na mga filter sa mga larawan mula sa mikroskopyo, natututo silang tuklasin ang mga simpleng pattern (gilid) sa mga unang layer at mga komplikadong istruktura (hugis ng selula, tekstura) sa mas malalalim na layer. Ang hierarkikal na pagkatuto na ito ay ginagawang napakatatag ang DL kahit na malaki ang pagbabago sa intensity profiles.
Visual na Paghahambing: ML kumpara sa DL Pipelines


Pangunahing Aplikasyon ng AI sa Mikroskopyo
Ngayon ay naka-embed ang AI sa maraming gawain sa pagpoproseso ng larawan sa buong daloy ng mikroskopyo:
Segmentasyon
Pagpapangkat ng mga larawan sa mga rehiyon (hal., pagtukoy sa bawat selula o nukleo). Mahusay ang mga deep network tulad ng U-Net sa gawaing ito.
- Semantic segmentation: Mga label ng klase bawat pixel
- Instance segmentation: Paghihiwalay ng mga indibidwal na bagay
- Mataas na katumpakan sa masikip o malabong mga larawan
- Vision foundation models (hal., μSAM) ay ngayon ayang gamitin sa mikroskopyo
Klasipikasyon ng Bagay
Pagkatapos ng segmentasyon, tinutukoy ng AI ang bawat bagay nang may mataas na katumpakan.
- Pagtukoy ng uri ng selula
- Pagtukoy ng yugto ng mitosis
- Pagtuklas ng mga palatandaan ng patolohiya
- Nakikilala ang mga banayad na phenotype na mahirap sukatin nang manu-mano
Pagsubaybay
Sa time-lapse microscopy, sinusubaybayan ng AI ang mga selula o particle sa mga frame nang may walang kapantay na katumpakan.
- Malaki ang pinabuting katumpakan ng pagsubaybay gamit ang deep learning
- Nagbibigay-daan sa maaasahang pagsusuri ng mga gumagalaw na selula
- Nakukuha ang mga dinamikong biyolohikal na proseso
Pagbabawas ng Ingay at Super-Resolution
Pinapahusay ng mga modelo ng AI ang kalidad ng larawan sa pamamagitan ng pagtanggal ng ingay at blur.
- Physics-informed deep models ang natututo ng optics ng mikroskopyo
- Nagre-reconstruct ng mas matalim at walang artefact na mga larawan
- Mas mataas na resolusyon na may mas kaunting artefact kumpara sa tradisyunal na mga pamamaraan
Awtomatikong Pagkuha
Pinapatnubayan ng AI ang mikroskopyo mismo nang real-time.
- Sinusuri ang mga live na larawan upang gumawa ng matalinong desisyon
- Awtomatikong inaayos ang pokus at sinusuri ang mga lugar ng interes
- Binabawasan ang phototoxicity at nakakatipid ng oras
- Nagbibigay-daan sa high-throughput at adaptive imaging experiments

Mga Sikat na AI na Kagamitan sa Pagpoproseso ng Larawan mula sa Mikroskopyo
A rich ecosystem of tools supports AI in microscopy. Researchers have built both general-purpose and specialized software, many open-source:
Cellpose
| Developer | Carsen Stringer at Marius Pachitariu (MouseLand research group) |
| Sinusuportahang Platform |
Nangangailangan ng Python (pip/conda installation). GUI ay available lamang sa desktop. |
| Suporta sa Wika | Dokumentasyong Ingles; malawakang ginagamit sa mga research lab sa buong mundo |
| Modelo ng Pagpepresyo | Libreng open-source sa ilalim ng lisensyang BSD-3-Clause |
Pangkalahatang-ideya
Ang Cellpose ay isang advanced na kasangkapan sa segmentation na batay sa deep learning na dinisenyo para sa mga larawang mikroskopyo. Bilang isang pangkalahatang algorithm, tumpak nitong nase-segment ang iba't ibang uri ng selula (nukleo, sitosol, atbp.) sa iba't ibang modality ng imaging nang hindi nangangailangan ng muling pagsasanay ng modelo. Sa kakayahan nitong human-in-the-loop, maaaring pinuhin ng mga mananaliksik ang mga resulta, iakma ang modelo sa kanilang data, at gamitin ang sistema sa parehong 2D at 3D na workflow ng imaging.
Pangunahing Mga Tampok
Gumagana agad para sa malawak na uri ng mga selula, stain, at modality ng imaging nang walang custom na pagsasanay.
Sumusuporta sa buong 3D stacks gamit ang "2.5D" na pamamaraan na muling ginagamit ang 2D na mga modelo para sa volumetric na data.
Manwal na itama ang mga resulta ng segmentation at muling sanayin ang modelo gamit ang iyong sariling data para sa mas pinahusay na katumpakan.
Maaaring ma-access sa pamamagitan ng Python API, command-line interface, o graphical user interface para sa flexible na workflow.
Mga kakayahan sa pag-denoise, pag-deblur, at pag-upsample upang mapabuti ang kalidad ng imahe bago ang segmentation.
I-download o I-access
Teknikal na Background
Inilunsad ang Cellpose sa isang mahalagang pag-aaral nina Stringer, Wang, Michaelos, at Pachitariu, na tinuruan gamit ang isang malaking at napaka-diverse na dataset na naglalaman ng higit sa 70,000 na na-segment na mga bagay. Ang pagkakaibang ito ang nagpapahintulot sa modelo na mag-generalize sa iba't ibang hugis, laki, at mga setting ng mikroskopyo, na malaki ang naitutulong upang mabawasan ang pangangailangan ng custom na pagsasanay sa karamihan ng mga kaso. Para sa 3D na data, matalino nitong muling ginagamit ang 2D na modelo sa isang "2.5D" na paraan, na iniiwasan ang pangangailangan ng ganap na 3D-annotated na training data habang nagbibigay pa rin ng volumetric na segmentation. Inilunsad ng Cellpose 2.0 ang human-in-the-loop na muling pagsasanay, na nagpapahintulot sa mga gumagamit na manwal na itama ang mga prediksyon at muling sanayin gamit ang kanilang sariling mga imahe para sa mas mahusay na performance sa partikular na mga dataset.
Pag-install at Setup
I-set up ang Python environment gamit ang conda:
conda create -n cellpose python=3.10I-activate ang environment at i-install ang Cellpose:
# For GUI support
pip install cellpose[gui]

# For minimal setup (API/CLI only)
pip install cellpose
Pagsisimula
GUI Mode
- Patakbuhin ang GUI sa pamamagitan ng:
python -m cellpose - I-drag at i-drop ang mga file ng imahe (
.tif,.png, atbp.) sa interface - Piliin ang uri ng modelo (hal., "cyto" para sa sitosol o "nuclei" para sa nukleo)
- I-set ang tinatayang diameter ng selula o hayaang awtomatikong i-calibrate ng Cellpose
- I-click upang simulan ang segmentation at tingnan ang mga resulta
Python API Mode
from cellpose import models

# Load model
model = models.Cellpose(model_type='cyto')

# Segment images
masks, flows = model.eval(images, diameter=30)
Pinuhin at Muling Sanayin
- Pagkatapos makagawa ng mga mask, itama ang segmentation sa GUI sa pamamagitan ng pagsasama o pagtanggal ng mga mask nang manu-mano
- Gamitin ang built-in na mga function sa pagsasanay upang muling sanayin gamit ang mga naitama na halimbawa
- Mas pinahusay na performance ng modelo sa iyong partikular na dataset
Proseso ng 3D Data
- I-load ang multi-Z TIFF o volumetric stack
- Gamitin ang
--Zstackna flag sa GUI o API upang iproseso bilang 3D - Opsyonal na pinuhin ang 3D flows gamit ang smoothing o espesyal na mga parameter para sa mas mahusay na segmentation
Mga Limitasyon at Mga Dapat Isaalang-alang
- Trade-off sa Pangkalahatang Modelo: Bagaman malawak ang gamit ng pangkalahatang modelo, ang mga napaka-hindi pangkaraniwang hugis ng selula o kondisyon ng imaging ay maaaring mangailangan ng muling pagsasanay.
- Pagsisikap sa Anotasyon: Ang human-in-the-loop na pagsasanay ay nangangailangan ng manwal na pagwawasto, na maaaring matrabaho para sa malalaking dataset.
- Kumplikasyon sa Pag-install: Ang pag-install ng GUI ay maaaring mangailangan ng paggamit ng command-line, conda environments, at pamamahala ng mga dependency ng Python — hindi palaging madali para sa mga hindi programmer.
- Desktop Lang: Ang Cellpose ay dinisenyo para sa desktop na paggamit; walang katutubong Android o iOS na aplikasyon.
Madalas Itanong
Hindi — Nagbibigay ang Cellpose ng mga pretrained, pangkalahatang modelo na kadalasang gumagana nang maayos nang walang muling pagsasanay. Gayunpaman, para sa pinakamainam na resulta sa espesyal o hindi pangkaraniwang data, maaari kang mag-anotate at muling sanayin gamit ang human-in-the-loop na mga tampok.
Oo — sinusuportahan nito ang 3D sa pamamagitan ng muling paggamit ng 2D na modelo (tinatawag na "2.5D"), at maaari mong patakbuhin ang volumetric stacks sa GUI o API.
Lubos na inirerekomenda ang GPU para sa mas mabilis na inference at pagsasanay, lalo na sa malalaking o 3D na dataset, ngunit maaari ring patakbuhin ang Cellpose sa mga makina na CPU lamang na may mas mabagal na performance.
Sa GUI, itakda ang tinatayang diameter ng selula nang manu-mano o hayaang awtomatikong i-calibrate ito ng Cellpose. Maaari mong pinuhin ang mga resulta at muling sanayin kung hindi optimal ang segmentation.
Oo — kasama sa mga bagong bersyon (Cellpose 3) ang mga modelo para sa pagpapanumbalik ng imahe tulad ng pag-denoise, pag-deblur, at pag-upsample upang mapabuti ang kalidad ng segmentation bago ang pagproseso.
StarDist
| Developer | Uwe Schmidt, Martin Weigert, Coleman Broaddus, at Gene Myers |
| Sinusuportahang Mga Platform |
|
| Suporta sa Wika | Open-source na proyekto na may dokumentasyon at komunidad na pangunahing nasa Ingles |
| Modelo ng Presyo | Libreng at open source. Lisensyado sa ilalim ng BSD-3-Clause |
Pangkalahatang-ideya
Ang StarDist ay isang deep-learning na kasangkapan para sa instance segmentation sa mga microscopy na larawan. Kinakatawan nito ang bawat bagay (tulad ng mga nukleo ng selula) bilang isang star-convex na polygon sa 2D o polyhedron sa 3D, na nagpapahintulot ng tumpak na pagtuklas at paghihiwalay ng mga siksik o nag-o-overlap na mga bagay. Sa matibay nitong arkitektura, malawakang ginagamit ang StarDist para sa awtomatikong segmentation ng mga selula at nukleo sa fluorescence microscopy, histopathology, at iba pang aplikasyon ng bioimage analysis.
Pangunahing Mga Tampok
Napakatumpak na instance segmentation gamit ang star-convex na mga polygon (2D) at polyhedra (3D) para sa maaasahang pagtuklas ng mga bagay.
Nakatuong mga modelo para sa parehong 2D na mga larawan at 3D volumetric na data para sa komprehensibong microscopy analysis.
Handang gamitin na mga modelo para sa fluorescence nuclei, H&E-stained histology, at iba pang karaniwang imaging na mga senaryo.
I-classify ang mga natukoy na bagay sa magkakaibang klase (hal., iba't ibang uri ng selula) sa isang segmentation run.
Walang patid na integrasyon sa ImageJ/Fiji, QuPath, at napari para sa madaling GUI-based na mga workflow.
Komprehensibong pagsusuri ng instance segmentation kabilang ang precision, recall, F1 score, at panoptic quality.
Teknikal na Background
Orihinal na ipinakilala sa isang MICCAI 2018 na papel, ang pangunahing inobasyon ng StarDist ay ang prediksyon ng radial distances sa kahabaan ng mga fixed rays na pinagsama sa object probability para sa bawat pixel, na nagpapahintulot ng tumpak na rekonstruksyon ng star-convex na mga hugis. Ang pamamaraang ito ay maaasahang naghihiwalay ng mga magkadikit na bagay na mahirap paghiwalayin gamit ang tradisyunal na pixel-based o bounding-box na mga pamamaraan.
Ang mga kamakailang pag-unlad ay pinalawak ang StarDist sa mga larawan ng histopathology, na nagpapahintulot hindi lamang sa segmentation ng nukleo kundi pati na rin sa multi-class classification ng mga natukoy na bagay. Nakamit ng pamamaraan ang nangungunang pagganap sa mga hamon tulad ng CoNIC (Colon Nuclei Identification and Counting) challenge.
I-download o I-access
Pag-install at Setup
I-install ang TensorFlow (bersyon 1.x o 2.x) bilang paunang kinakailangan para sa StarDist.
Gamitin ang pip para i-install ang StarDist Python package:
pip install stardistPara sa napari:
pip install stardist-napariPara sa QuPath: I-install ang StarDist extension sa pamamagitan ng pag-drag ng .jar na file papunta sa QuPath.
Para sa ImageJ/Fiji: Gamitin ang built-in na plugin manager o manu-manong pag-install sa pamamagitan ng plugins menu.
Pagsasagawa ng Segmentation
I-load ang pre-trained na modelo, i-normalize ang iyong larawan, at patakbuhin ang prediksyon:
from stardist.models import StarDist2D
model = StarDist2D.from_pretrained('2D_versatile_fluo')
labels, details = model.predict_instances(image)Buksan ang iyong larawan sa napari, piliin ang StarDist plugin, pumili ng pre-trained o custom na modelo, at patakbuhin ang prediksyon nang direkta mula sa GUI.
Gamitin ang StarDist plugin mula sa Plugins menu upang i-apply ang modelo sa iyong image stack gamit ang madaling gamitin na interface.
Pagkatapos i-install ang extension, patakbuhin ang StarDist detection gamit ang scripting console o graphical interface ng QuPath para sa histopathology analysis.
Pagsasanay at Fine-Tuning
Gumawa ng ground-truth label images kung saan bawat bagay ay may natatanging label. Gamitin ang mga annotation tool tulad ng LabKit, QuPath, o Fiji para ihanda ang iyong dataset.
Gamitin ang StarDist Python API para mag-train ng bagong modelo o mag-fine-tune ng umiiral na may iyong custom na annotated data.
Mga Opsyon sa Post-Processing
- Mag-apply ng non-maximum suppression (NMS) para alisin ang mga redundant na candidate shapes
- Gamitin ang StarDist OPP (Object Post-Processing) para pagsamahin ang mga mask para sa mga non-star-convex na hugis
Mga Limitasyon at Mga Dapat Isaalang-alang
- Ang star-convex na palagay ay maaaring hindi perpektong magmodelo ng mga napaka-non-convex o napaka-irregular na mga hugis
- Kompleksidad sa pag-install: ang mga custom na pag-install ay nangangailangan ng compatible na C++ compiler para sa pagbuo ng mga extension
- Ang GPU acceleration ay nakadepende sa compatible na bersyon ng TensorFlow, CUDA, at cuDNN
- May ilang ulat ng mga isyu sa pagpapatakbo ng ImageJ plugin dahil sa Java configuration
Madalas Itanong
Ang StarDist ay gumagana sa iba't ibang uri ng mga larawan kabilang ang fluorescence, brightfield, at histopathology (hal., H&E), salamat sa mga flexible na pre-trained na modelo at kakayahang umangkop sa iba't ibang imaging modalities.
Oo — sinusuportahan ng StarDist ang 3D instance segmentation gamit ang star-convex na polyhedra para sa volumetric data, na pinalalawak ang kakayahan ng 2D sa buong 3D na pagsusuri.
Hindi naman palaging kailangan. May mga pre-trained na modelo na madalas ay gumagana nang maayos agad. Gayunpaman, para sa mga espesyal o bagong data, ang pag-annotate at pagsasanay ng custom na mga modelo ay malaki ang naitutulong sa pagpapabuti ng katumpakan.
Ang StarDist ay nag-iintegrate sa napari, ImageJ/Fiji, at QuPath, na nagpapahintulot sa iyo na magpatakbo ng segmentation mula sa GUI nang walang coding. Sinusuportahan din nito ang direktang paggamit ng Python API para sa mga advanced na workflow.
Nagbibigay ang StarDist ng mga built-in na function para sa pagkalkula ng mga karaniwang sukatan ng instance segmentation kabilang ang precision, recall, F1 score, at panoptic quality upang masuri ang pagganap ng segmentation.
SAM
Impormasyon ng Aplikasyon
| Tagapag-develop | Meta AI Research (FAIR) |
| Sinusuportahang Mga Device |
|
| Wika at Pagkakaroon | Open-source foundational model na available sa buong mundo; dokumentasyon sa Ingles |
| Presyo | Libreng gamitin — open-source sa ilalim ng lisensya ng Meta sa pamamagitan ng GitHub at integrasyon sa MIB |
Pangkalahatang Pagsusuri
Ang SAM (Segment Anything Model) ay isang makapangyarihang AI foundational model na nilikha ng Meta na nagpapahintulot sa interactive at awtomatikong segmentasyon ng halos anumang bagay sa mga larawan. Gamit ang mga prompt tulad ng mga punto, bounding box, o magaspang na maskara, gumagawa ang SAM ng mga segmentation mask nang hindi nangangailangan ng muling pagsasanay para sa partikular na gawain. Sa pananaliksik sa mikroskopya, naangkop ang kakayahan ng SAM para sa segmentasyon ng mga selula, pagtukoy ng mga organelle, at pagsusuri ng histopathology, na nag-aalok ng isang scalable na solusyon para sa mga mananaliksik na nangangailangan ng isang promptable, pangkalahatang gamit na kasangkapan sa segmentasyon.
Detalyadong Panimula
Orihinal na sinanay ng Meta sa mahigit 1 bilyong maskara sa loob ng 11 milyong mga larawan, idinisenyo ang SAM bilang isang promptable foundational model para sa segmentasyon na may "zero-shot" na performance sa mga bagong domain. Sa pananaliksik sa medikal na imaging, sinuri ang SAM para sa whole-slide pathology segmentation, pagtuklas ng tumor, at pagkilala ng mga cell nuclei. Gayunpaman, ang performance nito sa mga siksik na mga instance—tulad ng mga cell nuclei—ay halo-halo: kahit na may malawak na mga prompt (hal., 20 clicks o mga kahon), maaaring mahirapan ang zero-shot segmentation sa mga komplikadong mikroskopyang larawan.
Upang matugunan ang limitasyong ito, lumitaw ang mga domain-specific na adaptasyon:
- SAMCell — Fine-tuned sa malalaking microscopy dataset para sa matatag na zero-shot segmentation sa iba't ibang uri ng selula nang hindi na kailangang muling sanayin sa bawat eksperimento
- μSAM — Muling sinanay sa mahigit 17,000 manu-manong na-anotang microscopy na mga larawan upang mapabuti ang katumpakan sa maliliit na cellular na istruktura
Pangunahing Mga Tampok
Flexible na interaksyon gamit ang mga punto, kahon, at maskara para sa tumpak na kontrol.
Nagsasagawa ng segmentasyon nang walang fine-tuning sa mga bagong domain ng imahe.
Naangkop para sa mikroskopya at histopathology gamit ang few-shot o prompt-based na muling pagsasanay.
Available sa Microscopy Image Browser (MIB) na may suporta para sa 3D at interpolated segmentation.
Pinapagana ng IDCC-SAM ang awtomatikong pagbibilang ng selula sa immunocytochemistry nang walang manu-manong anotasyon.
I-download o I-access
Gabay ng Gumagamit
- Buksan ang Microscopy Image Browser at pumunta sa SAM segmentation panel
- I-configure ang Python interpreter at piliin ang pagitan ng SAM-1 o SAM-2 na mga modelo
- Para sa GPU acceleration, piliin ang "cuda" sa execution environment (inirerekomenda para sa pinakamainam na performance)
- Point prompts: I-click ang isang bagay upang tukuyin ang positibong seed; gamitin ang Shift + click para palawakin at Ctrl + click para sa mga negatibong seed
- 3D stacks: Gamitin ang Interactive 3D mode—i-click ang isang slice, shift-scroll, at i-interpolate ang mga seed sa mga slices
- Adjust mode: Palitan, idagdag, ibawas ang mga maskara, o gumawa ng bagong layer kung kinakailangan
- Gamitin ang "Automatic everything" na opsyon ng MIB sa SAM-2 panel upang i-segment ang lahat ng nakikitang bagay sa isang rehiyon
- Suriin at pinuhin ang mga maskara pagkatapos ng segmentasyon kung kinakailangan
- Gamitin ang prompt-based fine-tuning pipelines (hal., "All-in-SAM") upang makabuo ng pixel-level na anotasyon mula sa mga sparse na prompt ng gumagamit
- Para sa pagbibilang ng selula, gamitin ang IDCC-SAM, na gumagamit ng SAM sa zero-shot pipeline na may post-processing
- Para sa mataas na katumpakan na segmentasyon ng selula, gamitin ang SAMCell, na fine-tuned sa mga microscopy cell image
Mga Limitasyon at Mga Dapat Isaalang-alang
- Hindi consistent ang zero-shot na performance sa mga siksik o nag-o-overlap na istruktura nang walang domain tuning
- Malaki ang epekto ng disenyo at estratehiya ng prompt sa kalidad ng segmentasyon
- Lubos na inirerekomenda ang GPU; napakabagal ng CPU inference
- Nahihirapan sa napakataas na resolusyon ng whole-slide images at multi-scale na tissue structures
- Maaaring kailanganin ang kasanayan sa machine learning para sa fine-tuning o pag-aangkop ng SAM sa mikroskopya
Madalas Itanong
Oo—sa pamamagitan ng mga adaptasyon tulad ng SAMCell, na fine-tunes ang SAM sa mga microscopy dataset na partikular para sa mga gawain sa segmentasyon ng selula.
Hindi palaging. Sa IDCC-SAM, maaari kang magsagawa ng zero-shot na pagbibilang ng selula nang walang manu-manong anotasyon.
Gamitin ang prompt-based fine-tuning (hal., "All-in-SAM") o mga pretrained microscopy na bersyon tulad ng μSAM, na sinanay sa mahigit 17,000 na na-anotang microscopy na mga larawan.
Bagaman posible sa CPU, lubos na inirerekomenda ang GPU para sa praktikal na bilis ng inference at real-time na interactive na segmentasyon.
Oo—sinusuportahan ng integrasyon ng SAM-2 sa MIB ang 3D segmentation na may seed interpolation sa mga slices para sa volumetric na pagsusuri.
AxonDeepSeg
| Tagapag-develop | NeuroPoly Lab sa Polytechnique Montréal at Université de Montréal |
| Sinusuportahang Platform |
|
| Wika | Dokumentasyong Ingles; open-source na kasangkapan na ginagamit sa buong mundo |
| Presyo | Libreng at open-source |
Pangkalahatang-ideya
Ang AxonDeepSeg ay isang AI-powered na kasangkapan para sa awtomatikong segmentation ng mga axon at myelin sa mga larawan ng mikroskopyo. Gamit ang convolutional neural networks, nagbibigay ito ng tumpak na tatlong-klaseng segmentation (axon, myelin, background) sa iba't ibang modality ng imaging kabilang ang TEM, SEM, at bright-field microscopy. Sa pamamagitan ng pag-automate ng mga morphometric na sukat tulad ng diameter ng axon, g-ratio, at kapal ng myelin, pinapadali ng AxonDeepSeg ang kwantitatibong pagsusuri sa pananaliksik sa neuroscience, na malaki ang naitutulong sa pagbawas ng oras sa manwal na anotasyon at pagpapabuti ng reproducibility.
Pangunahing Mga Tampok
Handang gamitin na mga modelo na na-optimize para sa TEM, SEM, at bright-field microscopy modalities.
Tumpak na klasipikasyon ng axon, myelin, at background na mga rehiyon sa mga larawan ng mikroskopyo.
Awtomatikong pagkalkula ng diameter ng axon, g-ratio, kapal ng myelin, at mga sukatan ng densidad.
Integrasyon sa Napari GUI na nagpapahintulot ng manwal na pag-aayos ng segmentation masks para sa mas mataas na katumpakan.
Maayos na naisasama sa mga custom na pipeline para sa malawakang pagsusuri ng neural tissue.
Komprehensibong mga test script na nagsisiguro ng reproducibility at maaasahang resulta ng segmentation.
Teknikal na Detalye
Binuo ng NeuroPoly Lab, ginagamit ng AxonDeepSeg ang deep learning upang maghatid ng mataas na presisyong segmentation para sa mga aplikasyon sa neuroscience. May mga pre-trained na modelo para sa iba't ibang modality ng mikroskopyo, na nagsisiguro ng versatility sa iba't ibang teknik sa imaging. Ang kasangkapan ay nakikipag-integrate sa Napari, na nagpapahintulot ng interaktibong pagwawasto ng segmentation masks, na nagpapahusay ng katumpakan sa mga mahihirap na dataset. Kinakalkula ng AxonDeepSeg ang mga pangunahing morphometric na sukatan, na sumusuporta sa high-throughput na pag-aaral ng istruktura at patolohiya ng neural tissue. Ang Python-based na framework nito ay nagpapadali ng integrasyon sa mga custom na pipeline para sa malawakang pagsusuri ng morpolohiya ng axon at myelin.
I-download o I-access
Pag-install at Setup
Tiyaking naka-install ang Python 3.8 o mas bago, pagkatapos ay i-install ang AxonDeepSeg at Napari gamit ang pip:
pip install axondeepseg napariPatakbuhin ang mga ibinigay na test script upang kumpirmahin na ang lahat ng bahagi ay maayos na naka-install at gumagana.
I-import ang mga larawan ng mikroskopyo (TEM, SEM, o bright-field) sa Napari o sa iyong Python environment.
Pumili ng angkop na pre-trained na modelo para sa iyong imaging modality at patakbuhin ang segmentation upang makabuo ng mga mask ng axon at myelin.
Awtomatikong kalkulahin ang mga morphometric na sukat kabilang ang diameter ng axon, g-ratio, densidad, at kapal ng myelin, pagkatapos ay i-export ang mga resulta sa format na CSV.
Gamitin ang Napari GUI upang manwal na ayusin ang mga segmentation mask kung kinakailangan, pagsamahin o tanggalin ang mga mask para sa mas pinahusay na katumpakan.
Mahahalagang Pagsasaalang-alang
- Maaaring bumaba ang performance sa mga bagong o hindi na-train na modality ng imaging
- Maaaring kailanganin ang manwal na pagwawasto para sa mga mahirap o komplikadong rehiyon
- Inirerekomenda ang GPU para sa mas mabilis na pagproseso ng malalaking dataset; sinusuportahan din ang pagproseso gamit ang CPU
Madalas Itanong
Sinusuportahan ng AxonDeepSeg ang TEM (Transmission Electron Microscopy), SEM (Scanning Electron Microscopy), at bright-field microscopy gamit ang mga pre-trained na modelo na na-optimize para sa bawat modality.
Oo, ang AxonDeepSeg ay ganap na libre at open-source, magagamit para sa akademiko at komersyal na paggamit.
Oo, awtomatikong kinakalkula ng AxonDeepSeg ang diameter ng axon, g-ratio, kapal ng myelin, at mga sukatan ng densidad mula sa mga segmented na larawan.
Inirerekomenda ang GPU para sa mas mabilis na segmentation ng malalaking dataset, ngunit sinusuportahan din ang pagproseso gamit ang CPU para sa mas maliliit na pagsusuri.
Oo, pinapayagan ng integrasyon sa Napari GUI ang interaktibong pagwawasto at pagpapahusay ng mga segmentation mask para sa mas mataas na katumpakan sa mga mahihirap na rehiyon.
Ilastik
| Developer | Ilastik Team sa European Molecular Biology Laboratory (EMBL) at mga kaugnay na akademikong kasosyo |
| Sinusuportahang Platform |
|
| Wika | Ingles |
| Presyo | Libreng at open-source |
Pangkalahatang-ideya
Ang Ilastik ay isang makapangyarihang, AI-driven na kasangkapan para sa interaktibong image segmentation, classification, at pagsusuri ng microscopy data. Gamit ang mga teknik sa machine learning tulad ng Random Forest classifiers, pinapayagan nito ang mga mananaliksik na mag-segment ng mga pixel, mag-classify ng mga bagay, mag-track ng mga selula sa paglipas ng panahon, at magsagawa ng density counting sa parehong 2D at 3D na mga dataset. Sa intuitive nitong interface at real-time na feedback, naaabot ng Ilastik ang mga siyentipiko na walang kaalaman sa programming at malawakang ginagamit sa cell biology, neuroscience, at biomedical imaging.
Pangunahing Mga Tampok
Real-time na feedback habang nag-aannotate ka ng mga kinatawang rehiyon para sa agarang resulta ng segmentation.
I-kategorya ang mga segmented na istruktura base sa mga morpolohikal at intensity na katangian.
I-track ang paggalaw at paghahati ng selula sa 2D at 3D time-lapse microscopy experiments.
Tantiya ng bilang sa masisikip na rehiyon nang walang malinaw na segmentation ng bawat bagay.
Semi-automatic na segmentation para sa komplikadong 3D na mga volume gamit ang madaling gamitin na interaksyon.
Awtomatikong iproseso ang maraming imahe gamit ang headless command-line mode.
I-download
Gabay sa Pagsisimula
I-download ang Ilastik para sa iyong operating system mula sa opisyal na website. Kasama sa package ang lahat ng kinakailangang Python dependencies, kaya sundin ang mga tagubilin sa pag-install para sa iyong platform.
Buksan ang Ilastik at piliin ang iyong analysis workflow: Pixel Classification, Object Classification, Tracking, o Density Counting. I-load ang iyong image dataset, na maaaring kabilang ang multi-channel, 3D, o time-lapse na mga imahe.
Mag-label ng ilang kinatawang pixel o bagay sa iyong mga imahe. Natututo ang Random Forest classifier ng Ilastik mula sa mga anotasyong ito at awtomatikong hinuhulaan ang mga label sa buong dataset mo.
Ilapat ang na-train na modelo para i-segment o i-classify ang buong dataset mo. I-export ang mga resulta bilang mga labeled na imahe, probability maps, o quantitative tables para sa karagdagang pagsusuri at visualisasyon.
Gamitin ang headless mode ng Ilastik para awtomatikong iproseso ang maraming imahe nang walang manual na interbensyon, perpekto para sa malawakang analysis pipelines.
Mga Limitasyon at Mga Dapat Isaalang-alang
- Ang interaktibong pag-label ay maaaring matrabaho para sa napakalalaking dataset
- Ang katumpakan ay nakasalalay sa kalidad at representatibo ng mga anotasyon ng gumagamit
- Mga pangangailangan sa memorya — ang mga napakataas na resolusyon o multi-gigabyte na dataset ay maaaring mangailangan ng malaking RAM
- Komplikadong data — maaaring hindi kasing galing ang Random Forest classifiers kumpara sa deep neural networks sa mga napaka-iba-iba o komplikadong imaging data
Madalas Itanong
Oo, ganap na sinusuportahan ng Ilastik ang 3D na mga volume at time-lapse na eksperimento para sa segmentation, tracking, at quantitative analysis sa maraming timepoint.
Oo, ang Ilastik ay ganap na libre at open-source, na magagamit ng lahat ng gumagamit nang walang mga limitasyon sa lisensya.
Hindi, nagbibigay ang Ilastik ng madaling gamitin na graphical interface na may real-time na feedback, kaya naaabot ito ng mga mananaliksik na walang kaalaman sa programming. Maaari ring gamitin ng mga advanced na gumagamit ang command-line batch processing.
Oo, ang dedikadong tracking workflow ay nagpapahintulot ng pagsusuri ng paggalaw at paghahati ng selula sa parehong 2D at 3D time-lapse na mga dataset na may awtomatikong lineage tracking.
Maaaring i-export ang mga output ng segmentation bilang mga labeled na imahe, probability maps, o quantitative tables, na nagpapahintulot ng tuloy-tuloy na integrasyon sa mga kasangkapan para sa pagsusuri at visualisasyon.
Saklaw ng mga kagamitang ito ang antas mula baguhan hanggang eksperto. Marami ang libre at open-source, na nagpapadali sa reproducible at maibabahaging AI workflows sa komunidad ng pananaliksik.
Mga Hamon at Hinaharap na Direksyon
Mga Kasalukuyang Hamon
Umuusbong na Mga Uso
Vision Foundation Models
Nangangako ang mga susunod na henerasyon ng AI system na bawasan ang pangangailangan para sa task-specific na pagsasanay.
- Mga modelong tulad ng SAM at mga sistema batay sa CLIP
- Isang AI ang humahawak sa maraming gawain sa mikroskopyo
- Mabilis na deployment at adaptasyon
AI-Assisted Microscopes
Nagiging realidad na ang ganap na autonomous at matalinong mga sistema ng mikroskopyo.
- Kontrol gamit ang natural na wika sa pamamagitan ng LLMs
- Ganap na awtomatikong feedback loops
- Pinapadali ang akses sa advanced na mikroskopyo

Pangunahing Mga Punto
- Mabilis na binabago ng AI ang pagpoproseso ng larawan mula sa mikroskopyo gamit ang pinahusay na katumpakan at awtomasyon
- Mas mahusay ang deep learning kaysa tradisyunal na machine learning sa komplikado at pabago-bagong mga larawan mula sa mikroskopyo
- Awtomatikong natututo ang CNNs ng hierarkikal na mga katangian mula sa raw pixels para sa matatag na pagsusuri
- Kabilang sa mga pangunahing aplikasyon ang segmentasyon, klasipikasyon, pagsubaybay, pagbabawas ng ingay, at awtomatikong pagkuha
- Nakadepende ang tagumpay sa kalidad ng datos at maingat na beripikasyon ng mga eksperto
- Ang vision foundation models at AI-assisted microscopes ang kinabukasan ng larangan
Sa patuloy na pag-unlad at pagsisikap ng komunidad (mga open-source na kagamitan, mga shared dataset), lalong magiging pangunahing bahagi ang AI ng "mata" ng mikroskopyo, na tumutulong sa mga siyentipiko na makita ang mga hindi nakikita.


No comments yet. Be the first to comment!