AI inom mikroskopbildbehandling
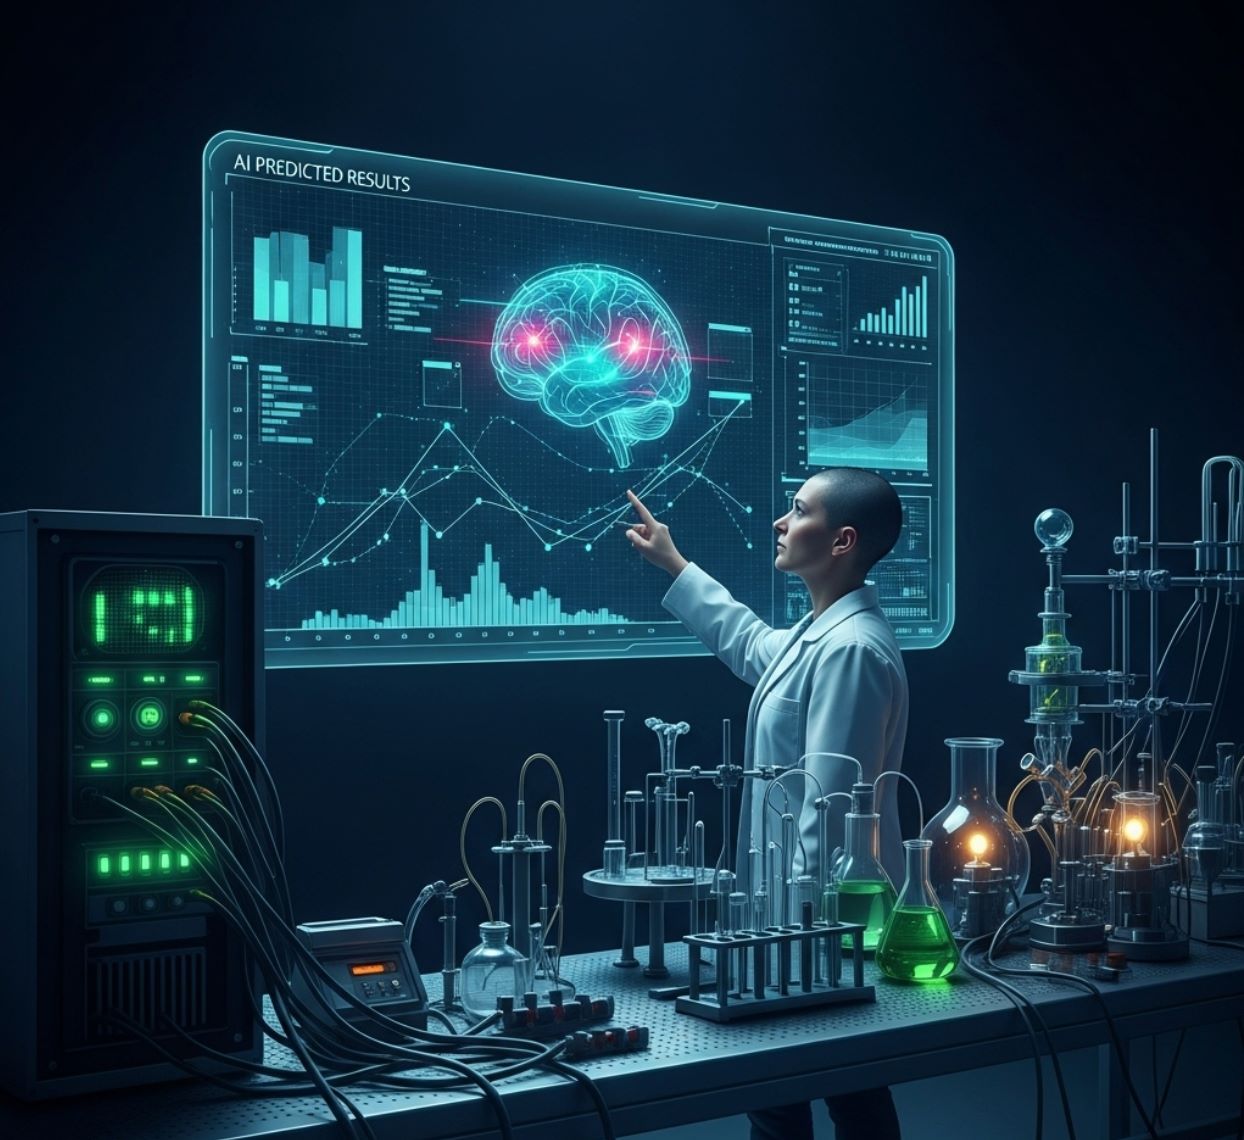
AI revolutionerar mikroskopbildbehandling med kraftfulla funktioner som precis segmentering, brusreducering, superupplösning och automatiserad bildinsamling. Denna artikel lyfter fram viktiga AI-verktyg och framväxande trender inom vetenskaplig forskning.
AI-tekniker revolutionerar mikroskopi genom att optimera bildinsamling och automatisera analys. I moderna smarta mikroskop kan AI-moduler justera bildparametrar i realtid (t.ex. fokus, belysning) för att minimera fotoblekning och förbättra signalen. Samtidigt kan djupa inlärningsalgoritmer sålla igenom komplex bilddata för att extrahera dolda biologiska insikter och till och med koppla bilder till annan data (t.ex. genomik).
AI-metoder: Maskininlärning vs Djupinlärning
AI-metoder sträcker sig från klassisk maskininlärning (ML) till modern djupinlärning (DL). Varje metod har sina styrkor och begränsningar:
Handgjorda egenskaper
- Forskare skapar manuellt bildegenskaper (kanter, texturer, former)
- Egenskaper matas till klassificerare (beslutsträd, SVM)
- Snabb att träna
- Har svårt med komplexa eller brusiga bilder
Automatisk egenskapsinlärning
- Flerlagrade neurala nätverk (CNN) lär sig egenskaper automatiskt
- End-to-end-inlärning från råa pixlar
- Mycket mer robust mot variationer
- Fångar invecklade texturer och strukturer pålitligt
Hur CNN fungerar: Konvolutionella neurala nätverk applicerar successiva filter på mikroskopbilder, lär sig att upptäcka enkla mönster (kanter) i tidiga lager och komplexa strukturer (cellformer, texturer) i djupare lager. Denna hierarkiska inlärning gör DL exceptionellt robust även när intensitetsprofiler varierar kraftigt.
Visuell jämförelse: ML vs DL-pipelines


Viktiga AI-tillämpningar inom mikroskopi
AI är nu inbäddat i många bildbehandlingsuppgifter i hela mikroskopiarbetsflödet:
Segmentering
Delar upp bilder i regioner (t.ex. identifierar varje cell eller kärna). Djupa nätverk som U-Net är mycket bra på denna uppgift.
- Semantisk segmentering: Klassificering per pixel
- Instanssegmentering: Separering av individuella objekt
- Hög noggrannhet på trånga eller svaga bilder
- Vision foundation-modeller (t.ex. μSAM) anpassade för mikroskopi
Objektklassificering
Efter segmentering klassificerar AI varje objekt med hög precision.
- Identifiering av celltyper
- Bestämning av mitotisk fas
- Detektion av patologiska indikatorer
- Skiljer subtila fenotyper som är svåra att kvantifiera manuellt
Spårning
I tidsförloppmikroskopi spårar AI celler eller partiklar över bildrutor med enastående noggrannhet.
- Djupinlärning förbättrar spårningsnoggrannheten dramatiskt
- Möjliggör pålitlig analys av rörliga celler
- Fångar dynamiska biologiska processer
Brusreducering & superupplösning
AI-modeller förbättrar bildkvaliteten genom att ta bort brus och oskärpa.
- Fysikinformerade djupa modeller lär sig mikroskopoptik
- Återskapar skarpare, artefaktfria bilder
- Högre upplösning med färre artefakter jämfört med traditionella metoder
Automatiserad insamling
AI styr mikroskopet i realtid.
- Analyserar livebilder för att fatta intelligenta beslut
- Justera automatiskt fokus och skannar intressanta områden
- Minskar fototoxicitet och sparar tid
- Möjliggör höggenomströmning och adaptiva bildexperiment

Populära AI-verktyg inom mikroskopbildbehandling
A rich ecosystem of tools supports AI in microscopy. Researchers have built both general-purpose and specialized software, many open-source:
Cellpose
| Utvecklare | Carsen Stringer och Marius Pachitariu (MouseLand forskargrupp) |
| Stödda plattformar |
Kräver Python (pip/conda-installation). GUI finns endast för skrivbord. |
| Språkstöd | Engelsk dokumentation; globalt använd i forskningslaboratorier världen över |
| Prissättningsmodell | Gratis och öppen källkod under BSD-3-Clause-licens |
Översikt
Cellpose är ett avancerat segmenteringsverktyg baserat på djupinlärning, utformat för mikroskopibilder. Som en generalistalgoritm segmenterar den noggrant olika celltyper (kärnor, cytoplasma etc.) över olika bildmodaliteter utan krav på omträning av modellen. Med mänsklig-in-the-loop-funktioner kan forskare förfina resultat, anpassa modellen till sina data och använda systemet för både 2D- och 3D-bildflöden.
Viktiga funktioner
Fungerar direkt för en mängd celltyper, färgningar och bildmodaliteter utan anpassad träning.
Stöder fullständiga 3D-staplar med en "2,5D"-metod som återanvänder 2D-modeller för volymetriska data.
Korrigera segmenteringsresultat manuellt och träna om modellen på dina egna data för förbättrad noggrannhet.
Tillgång via Python-API, kommandoradsgränssnitt eller grafiskt användargränssnitt för flexibla arbetsflöden.
Brusreducering, skärpning och uppskalning för att förbättra bildkvaliteten före segmentering.
Ladda ner eller få tillgång
Teknisk bakgrund
Cellpose introducerades i en banbrytande studie av Stringer, Wang, Michaelos och Pachitariu, tränad på en stor och mycket varierad datamängd med över 70 000 segmenterade objekt. Denna mångfald gör att modellen kan generalisera över cellformer, storlekar och mikroskopinställningar, vilket kraftigt minskar behovet av anpassad träning i de flesta fall. För 3D-data återanvänder Cellpose sin 2D-modell på ett "2,5D"-sätt, vilket undviker behovet av fullständigt 3D-annoterade träningsdata samtidigt som volymetrisk segmentering levereras. Cellpose 2.0 introducerade mänsklig-in-the-loop-omträning, vilket gör det möjligt för användare att manuellt korrigera förutsägelser och träna om på egna bilder för förbättrad prestanda på specifika datamängder.
Installation & Uppstart
Skapa en Python-miljö med conda:
conda create -n cellpose python=3.10Aktivera miljön och installera Cellpose:
# For GUI support
pip install cellpose[gui]

# For minimal setup (API/CLI only)
pip install cellpose
Kom igång
GUI-läge
- Starta GUI genom att köra:
python -m cellpose - Dra och släpp bildfiler (
.tif,.png, etc.) i gränssnittet - Välj modeltyp (t.ex. "cyto" för cytoplasma eller "nuclei" för kärnor)
- Ange uppskattad celldiameter eller låt Cellpose kalibrera automatiskt
- Klicka för att starta segmentering och visa resultat
Python API-läge
from cellpose import models

# Load model
model = models.Cellpose(model_type='cyto')

# Segment images
masks, flows = model.eval(images, diameter=30)
Förfina & träna om
- Efter att ha genererat masker, korrigera segmenteringen i GUI genom att slå ihop eller ta bort masker manuellt
- Använd inbyggda träningsfunktioner för att träna om på korrigerade exempel
- Förbättrad modellprestanda på din specifika datamängd
Bearbeta 3D-data
- Ladda en multi-Z TIFF eller volymetrisk stapel
- Använd
--Zstack-flaggan i GUI eller API för att bearbeta som 3D - Förfina eventuellt 3D-flöden via utjämning eller specialparametrar för bättre segmentering
Begränsningar & överväganden
- Modellens generalitet kontra specialisering: Även om generalistmodellen fungerar brett kan mycket ovanliga cellformer eller bildförhållanden kräva omträning.
- Annoteringsinsats: Mänsklig-in-the-loop-träning kräver manuella korrigeringar, vilket kan vara tidskrävande för stora datamängder.
- Installationskomplexitet: GUI-installation kan kräva kommandoradsanvändning, conda-miljöer och hantering av Python-beroenden – inte alltid enkelt för icke-programmerare.
- Endast skrivbord: Cellpose är designat för skrivbordsanvändning; inga inbyggda Android- eller iOS-appar finns.
Vanliga frågor
Nej – Cellpose tillhandahåller förtränade generalistmodeller som ofta fungerar bra utan omträning. För optimala resultat på speciella eller ovanliga data kan du dock annotera och träna om med hjälp av mänsklig-in-the-loop-funktionerna.
Ja – den stödjer 3D genom att återanvända sin 2D-modell (så kallad "2,5D"), och du kan bearbeta volymetriska staplar via GUI eller API.
En GPU rekommenderas starkt för snabbare inferens och träning, särskilt på stora eller 3D-datamängder, men Cellpose kan köras på CPU-only-maskiner med långsammare prestanda.
I GUI anger du uppskattad celldiameter manuellt eller låter Cellpose kalibrera automatiskt. Du kan förfina resultat och träna om om segmenteringen inte är optimal.
Ja – nyare versioner (Cellpose 3) inkluderar bildåterställningsmodeller för brusreducering, skärpning och uppskalning för att förbättra segmenteringskvaliteten före bearbetning.
StarDist
| Utvecklare | Uwe Schmidt, Martin Weigert, Coleman Broaddus och Gene Myers |
| Stödda plattformar |
|
| Språkstöd | Öppen källkod med dokumentation och community främst på engelska |
| Prissättningsmodell | Gratis och öppen källkod. Licensierad under BSD-3-Clause |
Översikt
StarDist är ett djupinlärningsverktyg för instanssegmentering i mikroskopibilder. Det representerar varje objekt (såsom cellkärnor) som en stjärnkonvex polygon i 2D eller polyeder i 3D, vilket möjliggör noggrann detektion och separation av tätt packade eller överlappande objekt. Med sin robusta arkitektur används StarDist brett för automatiserad cell- och kärnsegmentering inom fluorescensmikroskopi, histopatologi och andra bioimage-analysapplikationer.
Nyckelfunktioner
Mycket noggrann instanssegmentering med stjärnkonvexa polygoner (2D) och polyedrar (3D) för tillförlitlig objektdetektion.
Specifika modeller för både 2D-bilder och 3D-volymetriska data för omfattande mikroskopianalys.
Färdiga modeller för fluorescerande kärnor, H&E-färgade histologibilder och andra vanliga bildscenarier.
Klassificera upptäckta objekt i olika klasser (t.ex. olika celltyper) i en enda segmenteringskörning.
Sömlös integration med ImageJ/Fiji, QuPath och napari för tillgängliga GUI-baserade arbetsflöden.
Omfattande utvärdering av instanssegmentering inklusive precision, recall, F1-poäng och panoptisk kvalitet.
Teknisk bakgrund
StarDist introducerades ursprungligen i en MICCAI 2018-artikel, där kärninnovationen är förutsägelsen av radiala avstånd längs fasta strålar kombinerat med objektprobabilitet för varje pixel, vilket möjliggör noggrann rekonstruktion av stjärnkonvexa former. Denna metod segmenterar pålitligt tätt liggande objekt som är svåra att separera med traditionella pixelbaserade eller bounding-box-metoder.
Senare utvecklingar har utvidgat StarDist till histopatologibilder, vilket möjliggör inte bara kärnsegmentering utan även flerklassklassificering av upptäckta objekt. Metoden uppnådde toppresultat i utmaningar som CoNIC (Colon Nuclei Identification and Counting).
Ladda ner eller få tillgång
Installation & uppsättning
Installera TensorFlow (version 1.x eller 2.x) som en förutsättning för StarDist.
Använd pip för att installera StarDist Python-paketet:
pip install stardistFör napari:
pip install stardist-napariFör QuPath: Installera StarDist-tillägget genom att dra .jar-filen till QuPath.
För ImageJ/Fiji: Använd den inbyggda plugin-hanteraren eller manuell installation via plugins-menyn.
Köra segmentering
Ladda en förtränad modell, normalisera din bild och kör prediktion:
from stardist.models import StarDist2D
model = StarDist2D.from_pretrained('2D_versatile_fluo')
labels, details = model.predict_instances(image)Öppna din bild i napari, välj StarDist-plugin, välj en förtränad eller egen modell och kör prediktion direkt från GUI.
Använd StarDist-plugin från Plugins-menyn för att applicera en modell på din bildstack med ett intuitivt gränssnitt.
Efter installation av tillägget, kör StarDist-detektion via QuPaths skriptkonsol eller grafiska gränssnitt för histopatologianalys.
Träning & finjustering
Skapa annoterade sanningar där varje objekt är unikt märkt. Använd annoteringsverktyg som LabKit, QuPath eller Fiji för att förbereda din dataset.
Använd StarDists Python-API för att träna en ny modell eller finjustera en befintlig med dina egna annoterade data.
Efterbehandlingsalternativ
- Tillämpa non-maximum suppression (NMS) för att eliminera redundanta kandidatformer
- Använd StarDist OPP (Object Post-Processing) för att slå samman masker för icke-stjärnkonvexa former
Begränsningar & överväganden
- Antagandet om stjärnkonvexitet kan inte modellera mycket icke-konvexa eller mycket oregelbundna former perfekt
- Installationskomplexitet: anpassade installationer kräver en kompatibel C++-kompilator för att bygga tillägg
- GPU-acceleration beror på kompatibla versioner av TensorFlow, CUDA och cuDNN
- Vissa användare rapporterar problem med att köra ImageJ-plugin på grund av Java-konfiguration
Vanliga frågor
StarDist fungerar med en mängd olika bildtyper inklusive fluorescens, ljusfält och histopatologi (t.ex. H&E), tack vare sina flexibla förtränade modeller och anpassningsbarhet till olika bildmodaliteter.
Ja — StarDist stödjer 3D-instanssegmentering med stjärnkonvexa polyedrar för volymetriska data, vilket utökar 2D-funktionaliteten till full 3D-analys.
Inte nödvändigtvis. Förtränade modeller finns tillgängliga och fungerar ofta bra direkt. Men för specialiserade eller nya data förbättrar annotering och träning av egna modeller noggrannheten avsevärt.
StarDist integreras med napari, ImageJ/Fiji och QuPath, vilket gör att du kan köra segmentering från ett GUI utan kodning. Det stödjer också direkt användning av Python-API för avancerade arbetsflöden.
StarDist erbjuder inbyggda funktioner för att beräkna vanliga instanssegmenteringsmått inklusive precision, recall, F1-poäng och panoptisk kvalitet för att bedöma segmenteringsprestanda.
SAM
Applikationsinformation
| Utvecklare | Meta AI Research (FAIR) |
| Stödda enheter |
|
| Språk & Tillgänglighet | Öppen källkod grundmodell tillgänglig globalt; dokumentation på engelska |
| Prissättning | Gratis — öppen källkod under Metas licens via GitHub och MIB-integration |
Allmän översikt
SAM (Segment Anything Model) är en kraftfull AI-grundmodell skapad av Meta som möjliggör interaktiv och automatisk segmentering av praktiskt taget vilket objekt som helst i bilder. Genom att använda prompts som punkter, avgränsningsrutor eller grova masker genererar SAM segmenteringsmasker utan att kräva uppgiftsspecifik omträning. Inom mikroskopiforskning har SAM:s flexibilitet anpassats för cellsegmentering, organelldetektion och histopatologisk analys, vilket erbjuder en skalbar lösning för forskare som behöver ett promptbart, allmänt segmenteringsverktyg.
Detaljerad introduktion
Ursprungligen tränad av Meta på över 1 miljard masker över 11 miljoner bilder, designades SAM som en promptbar grundmodell för segmentering med "zero-shot"-prestanda på nya domäner. Inom medicinsk bildforskning har SAM utvärderats för helbildssegmentering av patologipreparat, tumördetektion och identifiering av cellkärnor. Dock är dess prestanda på tätt packade instanser – såsom cellkärnor – blandad: även med omfattande prompts (t.ex. 20 klick eller rutor) kan zero-shot-segmentering ha svårt i komplexa mikroskopibilder.
För att hantera denna begränsning har domänspecifika anpassningar utvecklats:
- SAMCell — Finjusterad på stora mikroskopidataset för stark zero-shot-segmentering över olika celltyper utan omträning per experiment
- μSAM — Omtränad på över 17 000 manuellt annoterade mikroskopibilder för att förbättra noggrannheten på små cellulära strukturer
Nyckelfunktioner
Flexibel interaktion med punkter, rutor och masker för exakt kontroll.
Utför segmentering utan finjustering på nya bilddomäner.
Anpassningsbar för mikroskopi och histopatologi via få-skotts- eller promptbaserad omträning.
Tillgänglig i Microscopy Image Browser (MIB) med stöd för 3D- och interpolerad segmentering.
IDCC-SAM möjliggör automatisk cellräkning i immunocytokemi utan manuell annotering.
Ladda ner eller få tillgång
Användarguide
- Öppna Microscopy Image Browser och navigera till SAM-segmenteringspanelen
- Konfigurera Python-tolk och välj mellan SAM-1 eller SAM-2 modeller
- För GPU-acceleration, välj "cuda" i exekveringsmiljön (rekommenderas för optimal prestanda)
- Point prompts: Klicka på ett objekt för att definiera ett positivt frö; använd Shift + klick för att utöka och Ctrl + klick för negativa frön
- 3D-staplar: Använd interaktivt 3D-läge – klicka på en skiva, shift-scrolla och interpolera frön över skivor
- Justera läge: Ersätt, lägg till, subtrahera masker eller skapa ett nytt lager efter behov
- Använd MIB:s "Automatiskt allt"-alternativ i SAM-2-panelen för att segmentera alla synliga objekt i ett område
- Granska och förfina masker efter segmentering vid behov
- Använd promptbaserade finjusteringspipelines (t.ex. "All-in-SAM") för att generera pixelnivåannoteringar från sparsamma användarprompter
- För cellräkning, använd IDCC-SAM, som använder SAM i en zero-shot-pipeline med efterbehandling
- För högnoggrann cellsegmentering, använd SAMCell, finjusterad på mikroskopiska cellbilder
Begränsningar & överväganden
- Zero-shot-prestanda är inkonsekvent på täta eller överlappande strukturer utan domänjustering
- Segmenteringskvaliteten beror starkt på promptdesign och strategi
- GPU rekommenderas starkt; CPU-inferens är mycket långsam
- Har svårt med mycket högupplösta helbilds-bilder och flerskaliga vävnadsstrukturer
- Finjustering eller anpassning av SAM för mikroskopi kan kräva maskininlärningskompetens
Vanliga frågor
Ja – genom anpassningar som SAMCell, som finjusterar SAM på mikroskopidataset specifikt för cellsegmenteringsuppgifter.
Inte alltid. Med IDCC-SAM kan du utföra zero-shot cellräkning utan manuella annoteringar.
Använd promptbaserad finjustering (t.ex. "All-in-SAM") eller förtränade mikroskopiversioner som μSAM, som är tränad på över 17 000 annoterade mikroskopibilder.
Även om det är möjligt på CPU, är GPU starkt rekommenderat för praktisk inferenshastighet och realtidsinteraktiv segmentering.
Ja – MIB:s SAM-2-integration stödjer 3D-segmentering med fröinterpolering över skivor för volymetrisk analys.
AxonDeepSeg
| Utvecklare | NeuroPoly Lab vid Polytechnique Montréal och Université de Montréal |
| Stödda plattformar |
|
| Språk | Engelsk dokumentation; öppen källkod som används globalt |
| Pris | Gratis och öppen källkod |
Översikt
AxonDeepSeg är ett AI-drivet verktyg för automatisk segmentering av axoner och myelin i mikroskopibilder. Genom att använda konvolutionella neurala nätverk levererar det noggrann segmentering i tre klasser (axon, myelin, bakgrund) över flera avbildningsmodaliteter inklusive TEM, SEM och ljusfältmikroskopi. Genom att automatisera morfometriska mätningar såsom axondiameter, g-ratio och myelintjocklek effektiviserar AxonDeepSeg kvantitativ analys inom neurovetenskaplig forskning, vilket avsevärt minskar manuell annoteringstid och förbättrar reproducerbarheten.
Viktiga funktioner
Färdiga modeller optimerade för TEM, SEM och ljusfältmikroskopi.
Exakt klassificering av axon, myelin och bakgrundsområden i mikroskopibilder.
Automatisk beräkning av axondiameter, g-ratio, myelintjocklek och densitetsmått.
Napari GUI-integration möjliggör manuell förfining av segmenteringsmasker för ökad noggrannhet.
Integreras sömlöst i anpassade arbetsflöden för storskalig analys av nervvävnad.
Omfattande testscripts säkerställer reproducerbarhet och tillförlitliga segmenteringsresultat.
Tekniska detaljer
Utvecklat av NeuroPoly Lab använder AxonDeepSeg djupinlärning för att leverera högprecisionssegmentering för neurovetenskapliga tillämpningar. Förtränade modeller finns tillgängliga för olika mikroskopimodaliteter, vilket säkerställer mångsidighet över avbildningstekniker. Verktyget integreras med Napari, vilket möjliggör interaktiva korrigeringar av segmenteringsmasker och förbättrar noggrannheten på utmanande dataset. AxonDeepSeg beräknar viktiga morfometriska mått och stödjer högkapacitetsstudier av nervvävnadsstruktur och patologi. Dess Python-baserade ramverk möjliggör integration i anpassade arbetsflöden för storskalig analys av axon- och myelinmorfologi.
Ladda ner eller få tillgång
Installation & uppsättning
Säkerställ att Python 3.8 eller senare är installerat, installera sedan AxonDeepSeg och Napari med pip:
pip install axondeepseg napariKör de medföljande testscripten för att bekräfta att alla komponenter är korrekt installerade och fungerar.
Importera mikroskopibilder (TEM, SEM eller ljusfält) till Napari eller din Python-miljö.
Välj lämplig förtränad modell för din avbildningsmodalitet och kör segmentering för att generera axon- och myelinmasker.
Beräkna automatiskt morfometriska mått inklusive axondiameter, g-ratio, densitet och myelintjocklek, och exportera sedan resultaten i CSV-format.
Använd Napari GUI för att manuellt justera segmenteringsmasker där det behövs, slå ihop eller ta bort masker för förbättrad noggrannhet.
Viktiga överväganden
- Prestanda kan minska på nya eller otränade avbildningsmodaliteter
- Manuella korrigeringar kan behövas för utmanande eller komplexa områden
- GPU rekommenderas för snabbare bearbetning av stora dataset; CPU-bearbetning stöds också
Vanliga frågor
AxonDeepSeg stöder TEM (transmissionselektronmikroskopi), SEM (svepelektronmikroskopi) och ljusfältmikroskopi med förtränade modeller optimerade för varje modalitet.
Ja, AxonDeepSeg är helt gratis och öppen källkod, tillgängligt för akademisk och kommersiell användning.
Ja, AxonDeepSeg beräknar automatiskt axondiameter, g-ratio, myelintjocklek och densitetsmått från segmenterade bilder.
GPU rekommenderas för snabbare segmentering av stora dataset, men CPU-bearbetning stöds också för mindre analyser.
Ja, Napari GUI-integration möjliggör interaktiva korrigeringar och förfining av segmenteringsmasker för högre noggrannhet i utmanande områden.
Ilastik
| Utvecklare | Ilastik-teamet vid European Molecular Biology Laboratory (EMBL) och associerade akademiska partners |
| Stödda plattformar |
|
| Språk | Engelska |
| Prissättning | Gratis och öppen källkod |
Översikt
Ilastik är ett kraftfullt AI-drivet verktyg för interaktiv bildsegmentering, klassificering och analys av mikroskopidata. Med maskininlärningstekniker som Random Forest-klassificerare möjliggör det för forskare att segmentera pixlar, klassificera objekt, spåra celler över tid och utföra täthetsräkning i både 2D- och 3D-dataset. Med sitt intuitiva gränssnitt och realtidsåterkoppling är Ilastik tillgängligt för forskare utan programmeringskunskaper och är brett använt inom cellbiologi, neurovetenskap och biomedicinsk bildbehandling.
Viktiga funktioner
Realtidsåterkoppling när du annoterar representativa områden för omedelbara segmenteringsresultat.
Kategorisera segmenterade strukturer baserat på morfologiska och intensitetsbaserade egenskaper.
Spåra cellrörelse och delning i 2D- och 3D-tidsförloppsexperiment.
Kvantifiera trånga områden utan explicit segmentering av enskilda objekt.
Semi-automatisk segmentering för komplexa 3D-volymer med intuitiv interaktion.
Bearbeta flera bilder automatiskt med kommandoradsläge utan grafiskt gränssnitt.
Ladda ner
Kom igång-guide
Ladda ner Ilastik för ditt operativsystem från den officiella webbplatsen. Paketet inkluderar alla nödvändiga Python-beroenden, så följ installationsinstruktionerna för din plattform.
Öppna Ilastik och välj ditt analysarbetsflöde: Pixelklassificering, Objektklassificering, Spårning eller Täthetsräkning. Ladda ditt bilddataset, som kan inkludera flerkanel-, 3D- eller tidsförloppsbilder.
Märk några representativa pixlar eller objekt i dina bilder. Ilastiks Random Forest-klassificerare lär sig från dessa annoteringar och förutspår automatiskt etiketter över hela ditt dataset.
Tillämpa den tränade modellen för att segmentera eller klassificera hela ditt dataset. Exportera resultat som märkta bilder, sannolikhetskartor eller kvantitativa tabeller för vidare analys och visualisering.
Använd Ilastiks headless-läge för att automatiskt bearbeta flera bilder utan manuell inblandning, idealiskt för storskaliga analysflöden.
Begränsningar & överväganden
- Interaktiv märkning kan vara tidskrävande för mycket stora dataset
- Noggrannhet beror på kvaliteten och representativiteten i användarannoteringarna
- Minne — mycket högupplösta eller multi-gigabyte dataset kan kräva betydande RAM
- Komplexa data — Random Forest-klassificerare kan prestera sämre än djupa neurala nätverk på mycket varierande eller komplexa bilddata
Vanliga frågor
Ja, Ilastik stödjer fullt ut 3D-volymer och tidsförloppsexperiment för segmentering, spårning och kvantitativ analys över flera tidpunkter.
Ja, Ilastik är helt gratis och öppen källkod, tillgängligt för alla användare utan licensrestriktioner.
Nej, Ilastik erbjuder ett intuitivt grafiskt gränssnitt med realtidsåterkoppling, vilket gör det tillgängligt för forskare utan programmeringskunskaper. Avancerade användare kan även använda kommandoradsbaserad batchbearbetning.
Ja, det dedikerade spårningsarbetsflödet möjliggör analys av cellrörelse och delning i både 2D- och 3D-tidsförloppsdataset med automatisk härstamningsspårning.
Segmenteringsresultat kan exporteras som märkta bilder, sannolikhetskartor eller kvantitativa tabeller, vilket möjliggör sömlös integration med efterföljande analysverktyg och visualiseringsprogram.
Dessa verktyg täcker allt från nybörjare till expertnivå. Många är gratis och open source, vilket underlättar reproducerbara och delbara AI-arbetsflöden inom forskarsamhället.
Utmaningar och framtida riktningar
Nuvarande utmaningar
Framväxande trender
Vision foundation-modeller
Nästa generations AI-system lovar att minska behovet av uppgiftsspecifik träning.
- Modeller som SAM och CLIP-baserade system
- En AI hanterar många mikroskopiuppgifter
- Snabbare implementering och anpassning
AI-assisterade mikroskop
Fullt autonoma och intelligenta mikroskopsystem blir verklighet.
- Naturlig språkstyrning via LLM
- Fullt automatiserade återkopplingsloopar
- Demokratiserar tillgång till avancerad mikroskopi

Viktiga slutsatser
- AI förändrar snabbt mikroskopbildbehandling med förbättrad noggrannhet och automation
- Djupinlärning överträffar traditionell maskininlärning på komplexa, varierande mikroskopibilder
- CNN lär sig automatiskt hierarkiska egenskaper från råa pixlar för robust analys
- Viktiga tillämpningar inkluderar segmentering, klassificering, spårning, brusreducering och automatiserad insamling
- Framgång beror på kvalitetsdata och noggrann validering av experter
- Vision foundation-modeller och AI-assisterade mikroskop representerar framtiden för området
Med fortsatt utveckling och gemenskapsinsatser (open source-verktyg, delade dataset) kommer AI i allt högre grad bli en kärnkomponent i mikroskopets "öga" och hjälpa forskare att se det osedda.


No comments yet. Be the first to comment!